
Which way it moved, and when, tells you what went wrong – in that order
Almost every wood movement failure can be identified from two facts you already have: which way the wood moved, and what time of year it happened. Shrinkage means the wood got drier than it was when you fixed it; swelling means it got wetter. Everything else is working out where the moisture went and what was stopping the wood following it. Work through these in order — the first three cover most of what you will ever see.
1. The floor gapped in winter
What it looks like. Fine, even gaps at most or all of the board joints, appearing over a few weeks of heating season and closing again in spring.
What it is. Normal. The floor lost moisture and every board shrank by its own share. The gaps are even because the shrinkage is even.
What decides how bad it is is where in the annual range the floor was installed. Install at the top of the range and it can only shrink; install in the middle and the same swing is split in two. Interpolating Table 4–2 at 70 degrees F, a house running 30 percent RH in winter and 55 in summer asks for 6.2 to 10.1 percent moisture content. The midpoint is about 8.2 — which is also, not coincidentally, what Table 13–2 recommends for interior flooring across most of the United States.
What to do. Nothing, if the gaps close in spring. If they do not close, the house is drier than the floor was ever conditioned for, and the fix is humidification rather than carpentry. If the gaps are wide enough to catch a fingernail on a 2‑1/4 in strip floor, the install moisture content was too high — run the numbers backwards and you can usually work out what it was.
2. The floor buckled, cupped at the edges, or lifted in summer
What it looks like. Boards tenting up, lifting off the subfloor, or crushing against each other at the edges. Usually in humid weather, usually near a wall.
What it is. The run grew and had nowhere to grow into. The expansion clearance at the perimeter was too small, absent, or pinched by a baseboard set tight.
The arithmetic. Take the per-board movement for the moisture rise, multiply by the number of boards, halve it — that is what each side needs. A 16‑ft run of 2‑1/4 in flatsawn red oak rising from 7 to 11 percent moisture content is 85 boards × 2.25 × 0.00369 × 4 = 2.82 in, which wants 1.41 in of free clearance at each side. That is more than most people leave.
What to do. Pull the base and check the gap is real and continuous, not just present at one wall. Check for fasteners through the field that have pinned the floor. Then find the moisture: a floor that rose four points did so for a reason, and the reason is usually a crawl space, a slab without a vapour retarder, or a summer with no air conditioning.
3. A wide board cupped
What it looks like. The board is dished or crowned across its width. A straightedge across the face tells you which, and which way matters.
What it is. Two things acting together. First, the board has a moisture difference between its two faces — the drier face shrinks more. Second, the species moves unevenly: the bark side of a flatsawn board is closer to pure tangential orientation than the heart side, so it shrinks further when both dry equally.
Which way it cups tells you which cause dominates. If the board has cupped away from the heart — the bark face concave — with no obvious moisture difference, that is the ring-orientation cause and it is the species’ tangential-to-radial ratio doing it. If one face is visibly wetter, the cup follows the drier face and that is a moisture-gradient problem: a deck board wet on top and dry underneath, a floor over a damp crawl space, a tabletop finished on one side only.
| Species | T/R ratio | Flatsawn cupping tendency |
|---|---|---|
| Pine, eastern white | 2.99 | High ratio, but very low absolute movement |
| Oak, red (commercial) | 2.34 | High ratio and high movement — the classic cupper |
| Beech, American | 2.27 | Among the worst-behaved domestic hardwoods |
| Maple, hard (sugar) | 2.14 | Wide flatsawn tops are a known problem |
| Cherry, black | 1.97 | Noticeably calmer |
| Douglas-fir (Coast) | 1.62 | Low ratio for a softwood |
| Walnut, black | 1.44 | Unusually even — wide flatsawn boards behave |
What to do. Fix the moisture difference first — finish both faces equally, ventilate the underside, deal with the crawl space. Then accept that a wide flatsawn board in a high-ratio species will always want to cup and detail for it: narrower boards, breadboard ends, battens that let the board slide, or quartersawn stock.
4. A glued-up panel split down the middle
What it looks like. A crack running with the grain, often along or beside a glue line, in a tabletop, a door panel or a wide shelf.
What it is. The panel was restrained across its width and shrank. Wood in tension across the grain is weak — far weaker than the glue line and far weaker than the fastener — so the wood is what gives.
Where the restraint usually is: a tabletop screwed through fixed holes into an apron; a panel glued into its frame groove; a shelf housed and glued at both ends; a wide board face-screwed at two points across its width; a breadboard end glued across its full length instead of only at the centre.
What to do. Release the restraint and let the panel move. Slotted or figure-eight fasteners for a top, panel floating dry in the groove, housings glued only at one end or across a short central span. Re-gluing the split without releasing the restraint produces the same split again somewhere else.
5. Nail pops and drywall cracks in a new house
What it looks like. Fastener heads pushing through the finish, cracks over door openings and at wall-ceiling junctions, usually in the first heating season.
What it is. Frame shrinkage. The Handbook lists it directly: “The most common signs of excessive shrinkage are cracks in plastered walls, truss rise, open joints, and nail pops in dry-wall construction; distortion of door openings; uneven floors; and loosening of joints and fastenings.”
Where it comes from. Not the studs — they shrink along their length, which is the direction wood barely moves. It is the horizontal members: “The extent of vertical shrinkage after the house is completed is proportional to the depth of wood used as supports in a horizontal position, such as girders, floor joists, and plates.” A 2×10 Coast Douglas-fir joist going from 17 to 8 percent loses about 0.218 in of depth. Stack a rim joist, a plate and a sill and you have half an inch of settlement that the drywall screwed to it has to follow.
What to do. After the fact, re-fasten and patch once the frame has stabilised through a full heating season — doing it earlier means doing it twice. Before the fact, the published tolerance is the one to work to: no more than about 5 percentage points above the in-service moisture content when the wall and ceiling finish goes on.
6. Truss rise — the ceiling lifting away from the partition walls
What it looks like. A crack opening along the top of an interior partition in winter, closing in summer, year after year.
What it is. The Handbook names truss rise in the same list as nail pops, and the mechanism is a moisture difference inside one truss. The top chords sit in a cold, damp attic and pick up moisture; the bottom chord sits above warm insulation and dries. The bottom chord shrinks relative to the top chords, the truss arches slightly, and the ceiling it carries lifts away from a partition that is sitting on the floor below.
What to do. This one is a detailing problem rather than a lumber problem. Do not nail the ceiling drywall to the bottom chord within about 16 in of the partition, use truss clips, and fit a crown moulding fixed to the ceiling only so the joint can open behind it. Trying to hold the truss down fights a force that will win.
Any trade

Contractor Job Estimator
Price remodels and GC work, then send a quote with no internal numbers.
Excel or Google Sheets. Best on a computer.
$29.00
BuyCheckout opens in a new tab.
The diagnosis kit
Nearly every fault below is settled by measuring one of three things: the moisture content of the wood now, how flat it still is, and whether the clearance you thought was there is actually there. The moisture meter is the one we cannot link — no verified affiliate link exists for one, so that slot is deliberately empty rather than filled with something that measures a different quantity.
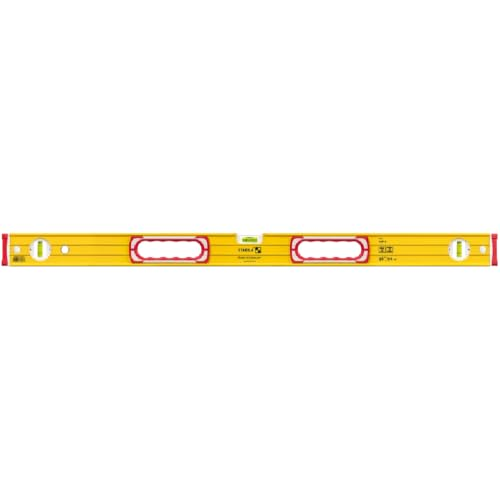
Stabila Type 196 48" Box Beam Level
- Cup and crown are measured with a straightedge, not with an opinion
- A floor lifting at the middle of a run reads clearly on four feet
- Also finds the dip that says a joist below has lost depth

Klein Tools 935DGGP Digital Angle Gauge
- Half of “this board moved twice as much” is ring orientation
- Reads the end-grain angle on the actual board that failed
- Settles a flatsawn-or-quartersawn argument in about ten seconds
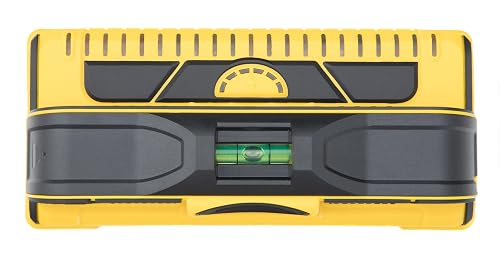
Franklin Sensors ProSensor M210 Stud Finder
- A split panel is usually a panel that was fastened in two places
- Finds what the trim was actually nailed to before you pull it off
- Thirteen sensors, so it maps the framing rather than guessing at it

Swanson TA122 Rafter Square 16×24
- Checks whether the perimeter gap is even or only present at one wall
- A run that buckled usually ran out of clearance at one end only
- Also squares the replacement courses when you put it back

Bosch GLL30 Self‑Leveling Cross‑Line Laser
- Frame shrinkage shows up as a floor that is no longer in one plane
- Reads the whole room at once instead of a four-foot window of it
- Tells a settled girder from a cupped board in about a minute
As an Amazon Associate, TestTalkHQ earns from qualifying purchases. Prices and availability can change.
7. Trim mitres opened at the corners
What it looks like. Casing and crown mitres that were tight on the day showing a hairline wedge a few months later, worst on wide stock.
What it is. The width of the trim shrank, and because a mitre is a 45 degree cut across that width, shrinkage across the face opens the joint at the heel or the toe. A 3‑1/2 in casing in flatsawn poplar — CT = 0.00289 — losing four points of moisture content shrinks 3.5 × 0.00289 × 4 = 0.040 in. That is a visible line.
What to do. Acclimate trim to the finished house before cutting it, which for interior work means the Table 13–2 band of 6 to 10 percent in most of the country. Glue mitres rather than only nailing them, so the joint moves as one piece. On wide stock, a shallow back-bevel so the face closes first buys a little. And accept that painted trim gets caulked for a reason.
8. A door binds in summer and rattles in winter
What it looks like. A solid wood door catching on the latch side in humid weather, with a visible gap the rest of the year.
What it is. The door is wider in summer. A 32 in door with 24 in of panel and rail width moving across the grain, in flatsawn poplar at 0.00289, rising four points, gains roughly 24 × 0.00289 × 4 = 0.28 in — although in a frame-and-panel door most of that is taken up inside the panel grooves, which is exactly what they are for, and only the stile widths actually push the door wider.
What to do. Plane the latch stile in summer, not in winter — take it off at the widest point and the winter gap gets worse but the door always works. Seal the top and bottom edges, which are usually left raw and are where most of the moisture goes in and out. And check the real cause: a door that only started binding this year is often a humidity change in the house rather than the door.
9. Deck boards cupped, or the gaps closed up
What it looks like. Boards holding water in a dished face, or the drainage gaps closing to nothing.
What it is. Usually moisture gradient. A deck board is wet on top from rain and dry underneath, so the wet face swells and the board cups upward; or wet underneath over damp ground with no ventilation and it cups the other way. Closed gaps mean the boards were laid dry and have since taken on moisture — most commonly because they were laid straight off a dry rack in summer.
What to do. Ventilate underneath, keep the ground clear, and finish both faces and the edges if you finish at all. Lay boards at a moisture content near what they will live at outdoors rather than shop-dry: the Table 13–2 exterior recommendation is 12 percent average in most of the country, 9 in the dry southwest. And set the gap from the calculated swell rather than from a nail-shank rule of thumb.
10. A tread or a shelf split at its housing
What it looks like. A crack running out from the end of a housed tread, shelf or rail, often from a fastener.
What it is. The piece is captured at both ends and shrank. Housed stair treads are the classic case because they are wide: an 11‑1/4 in hard maple tread moving from a 10.1 percent shop condition to a 6.2 percent winter loses 0.155 in across its width, and if both ends are glued hard into their housings, that 5/32 in has to come out of the wood itself.
What to do. Wedge rather than glue the full width, fix at one end and let the other float, and cut the housing deeper than the tread needs so there is somewhere for the shrinkage to go. The same logic applies to a shelf in a dado and a rail in a mortise.
11. The floor is uneven and the cause is underneath it
What it looks like. A dip or a slope across a room that has appeared since the house was finished, with no cupping in the boards themselves.
What it is. Not the flooring — the frame. Different depths of horizontal lumber shrink by different amounts, so a room carried partly on a 2×10 joist and partly on a flush beam or a steel member settles unevenly. The Handbook’s point about vertical shrinkage being proportional to the depth of horizontal wood is exactly this failure.
What to do. Diagnose it with a laser across the whole room rather than a four-foot level, which cannot distinguish a cupped board from a sagging structure. If the differential is between wood and steel or wood and masonry, it will not recover in summer, and the fix is shimming or furring after the frame has stabilised.
12. The two failures that look like movement and are not
Before blaming moisture, rule out two things that produce similar symptoms.
Warp from reaction wood or cross grain. The Handbook notes that reaction wood with excessive longitudinal shrinkage “can occur in the same board with normal wood”, and that its presence together with cross grain “can cause serious warping, such as bow, crook, or twist, and cross breaks can develop in the zones of high shrinkage.” A board that twisted while its neighbours stayed flat is a grain problem in that board, not a room-humidity problem. No calculation predicts it and no acclimation prevents it — the answer is to cull it.
Liquid water rather than humidity. A leak, a slab without a vapour retarder, a dishwasher, a planter. The giveaway is that the problem is local: wood responding to room humidity responds everywhere in the room, more or less equally. One cupped board in a flat floor is a water source, not a climate.
Frequently asked questions
Why did my hardwood floor gap in winter and buckle in summer? Both are the same movement read in opposite directions. The floor was installed at one moisture content and the house swings either side of it through the year. Gapping means the boards lost moisture and shrank, and the total is shared across every joint in the run. Buckling means they gained moisture, grew, and ran out of anywhere to grow into. The fixes are different: gapping is addressed by installing at the middle of the expected range rather than the top of it, buckling by leaving the expansion clearance the calculated growth actually requires.
Which way does a board cup? A flatsawn board with no moisture difference between its faces cups away from the heart — the face that was nearer the bark is closer to pure tangential orientation and shrinks further. Where there is a moisture difference between the faces, that dominates instead, and the board cups toward the drier face. In practice both act together, which is why a deck board wet on top and dry underneath can cup upward even though the heart side is up.
Can a cupped board be flattened? Sometimes, if the cause was a moisture gradient and the gradient is removed in time — equalising the moisture on both faces lets the board relax back. A board that has cupped because of its ring orientation alone will not flatten while the moisture content stays where it is, and forcing it flat with fasteners transfers the stress into a split. Planing a cupped board flat at one moisture content leaves it thinner and still prone to cup at the next change.
How long until nail pops stop? Until the frame has reached its service moisture content, which realistically means through the first full heating season. Repairing before then means repairing twice. The Wood Handbook’s preventive standard is to get the framing within about 5 percentage points of its in-service moisture content before the wall and ceiling finish is applied, which is what keeps the movement small enough not to show.
Is truss rise a defect? It is a known behaviour rather than a lumber fault, and it is listed in the Wood Handbook alongside nail pops as a sign of frame moisture change. The top chords in a cold attic gain moisture while the bottom chord above warm insulation dries, the truss arches slightly, and the ceiling lifts off interior partitions. It is managed by detailing — truss clips, holding ceiling fasteners back from the partition, and a crown moulding fixed to one surface only — rather than by restraining the truss.
My deck gaps closed up. Did I lay it wrong? Probably you laid it dry. Boards laid at a shop or rack moisture content in summer will take on moisture outdoors and grow, closing the gaps you set. The exterior installation target in Table 13–2 is 12 percent average in most of the country and 9 percent in the dry southwest, so stock at 7 or 8 percent has several points of swelling still to do. Set the gap from the calculated swelling for the moisture rise you expect, not from a fixed rule.
Should I glue a panel into its frame? No. The groove exists so the panel can change width without pushing the stiles apart or tearing itself. A 12 in cherry panel moving between 6.9 and 11 percent moisture content changes width by about 0.12 in; glued in, that has to be absorbed by the wood in tension across the grain, which is the weakest direction it has. Float the panel dry in the groove, with the groove deep enough that it stays captured at the dry end of the range.
How do I know whether it is humidity or a leak? By whether the problem is general or local. Wood responding to room humidity responds across the whole room, more or less evenly. A single cupped board in a flat floor, or one swollen door in a house of normal ones, is a water source. Meter the suspect piece and meter a normal one a few feet away: a difference of several points in the same room means liquid water, not climate.