
A procedure you can finish in an afternoon, and the arithmetic done out loud so you can check it
The equation takes ten seconds. Getting honest numbers to put into it takes an afternoon, and that is the part that decides whether the answer is worth anything. Below is the order to measure in, what each measurement is actually of, the specific way each one gets taken wrong, and then four complete jobs worked through by hand so you can see what every step does to the result.
Five numbers, and only one of them is hard
Here is the whole input list for a movement calculation, and nothing else matters:
| Measurement | What it actually is | Where it comes from |
|---|---|---|
| Species | Which row of Wood Handbook Table 13–5 applies | The stamp, the invoice, or the wood itself |
| Ring orientation | Whether the width moves tangentially or radially | The end grain of the board, in one look |
| Width and thickness | The dimension the movement is a fraction of | A tape or a caliper, on the actual board |
| Moisture content now | Where the wood is starting from | A pin meter, on a freshly exposed face |
| Moisture content in service | Where it is going to end up | Table 4–2 from the room’s temperature and humidity |
Four of those five are a measurement you take in a few seconds. The fifth — the service moisture content — is the one that needs a judgement, because you cannot meter a room that is not finished yet. That is what the equilibrium table is for.
Step 1 — the species, and what the pile is actually made of
Table 13–5 lists species, and the lumber trade sells groups. That gap is the first place a movement calculation goes wrong, and it is not a small gap.
A stamp reading SPF covers spruce, pine and fir in several varieties. Inside the Wood Handbook’s own table, Engelmann spruce is 0.00248 tangentially and lodgepole pine is 0.00234 — close enough. But Hem‑Fir covers western hemlock at 0.00274 and the true firs down at 0.00245, and Southern Pine covers loblolly at 0.00259, longleaf at 0.00263, shortleaf at 0.00271 and slash at 0.00267. Those are all within about five percent of each other, which is below the noise floor of the calculation anyway.
The hardwood groups are where it bites. Commercial red oak as a group is 0.00369 tangentially. Commercial white oak is 0.00365, barely different — but overcup white oak on its own is 0.00462, a quarter more than the group average, and live oak is 0.00338. If what you have is identifiable, use the species. If it is a mixed rack, take the group figure and know that an individual board can sit either side of it.
Step 2 — reading the end grain, which is worth a factor of two
Stand the board on end and look at the growth rings. That one look decides which of the two coefficients drives the width, and the two differ by between about 1.4 and 3 times depending on species.
| What the end grain shows | Name | Width governed by | Face appearance |
|---|---|---|---|
| Rings roughly parallel to the wide face, curving near the edges | Flatsawn / plainsawn | Tangential — the big coefficient | Cathedral or flame figure |
| Rings standing roughly perpendicular to the wide face | Quartersawn | Radial — roughly half as much | Straight, tight vertical grain |
| Rings at roughly 45 degrees | Riftsawn | Between the two; treat as radial for width | Straight grain, no ray fleck |
| Mixed through the pile, or you cannot see it | Unknown | Tangential, on the Handbook’s own instruction | Varies |
The Handbook’s direction is explicit and it is worth quoting because people argue about it: “Tangential values for S0 should be used for estimating width shrinkage of plainsawn material and radial values for quartersawn material. For mixed or unknown ring orientations, tangential values are suggested.”
Note what that last clause means in practice. Assuming tangential is not pessimism, it is the published instruction, and it is the right call because the failure mode of under-estimating movement is a buckled floor and the failure mode of over-estimating it is a slightly wider gap under a baseboard.
Step 3 — metering the stock, and the three ways it goes wrong
A pin meter is the only honest reading of where the wood is now. Three things spoil it:
- Reading the surface instead of the board. A board that has been in a dry shop for a week has a dry shell and a wetter core. Pin meters read between the pins, so drive them in on a freshly crosscut end or a fresh face, not through the weathered outside.
- Reading one board. The Handbook’s own instruction on Table 13–2 is to “test at least 10% of each item” to get a realistic average, and it gives a worked example: “in an ordinary dwelling containing 60 floor joists, at least six tests should be made on joists selected at random.”
- Not correcting for species or temperature. Resistance meters are calibrated against a reference species; most carry a correction table. Use it.
What you are looking for is the band for the job. From the Handbook: construction softwood “usually targeted for drying to an average moisture content of 15%, not to exceed 19%”; appearance-grade softwood to 10 to 12 percent; furniture, cabinet and millwork softwood to 7 to 9; hardwood for furniture, cabinets and millwork “usually dried to 6% to 8% moisture content.”
Any trade

Contractor Job Estimator
Price remodels and GC work, then send a quote with no internal numbers.
Excel or Google Sheets. Best on a computer.
$29.00
BuyCheckout opens in a new tab.
What the procedure needs
Four of the five inputs are measurements you take on site, and none of them needs anything exotic. The one tool we would put at the top of this list and cannot is a pin-type moisture meter — we have no verified affiliate link for one, so that slot stays empty rather than being filled with something adjacent. It is still the first thing to buy if you do this work.

Klein Tools 935DGGP Digital Angle Gauge
- Ring angle to the face decides which coefficient drives the width
- Under about 45 degrees behaves flatsawn, over it behaves quartersawn
- Zero and relative modes, magnetic base — quicker than eyeballing a stack
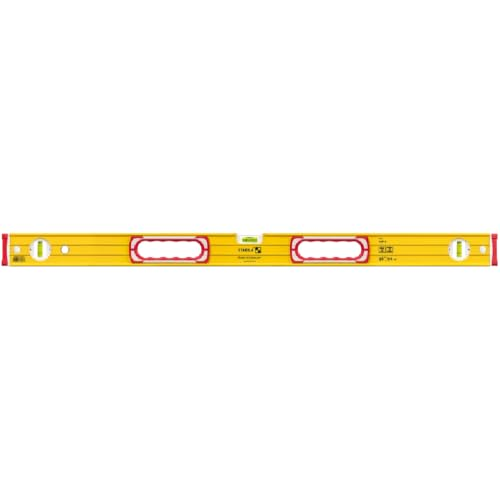
Stabila Type 196 48" Box Beam Level
- A straightedge across a wide board is how you measure cup, not guess it
- Catches a floor starting to crown before anyone calls it a failure
- Milled aluminium box section, so it is still straight next year
Swanson TA122 Rafter Square 16×24
- Marks the same perimeter clearance at both ends of a long run
- Squares the first course, which is what keeps the gap even across
- The allowance you calculated is only useful if it is actually there
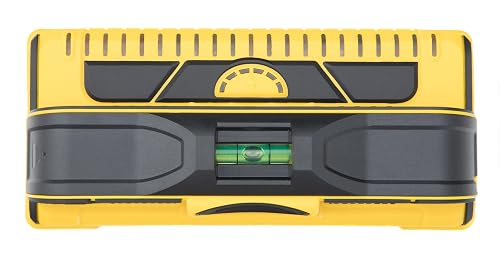
Franklin Sensors ProSensor M210 Stud Finder
- Wide stock wants one fixed point and the rest free to slide
- You cannot plan that without knowing where the framing actually is
- Thirteen sensors read the whole stud rather than hunting an edge

Bosch GLL30 Self‑Leveling Cross‑Line Laser
- A 40‑ft run has to keep its expansion clearance at the far wall too
- Snaps the starting line so both ends end up with what you planned
- Faster and more repeatable than walking a 4‑ft level across a room
As an Amazon Associate, TestTalkHQ earns from qualifying purchases. Prices and availability can change.
Step 4 — picking the service moisture content instead of guessing it
This is the number people invent, and there is no need to. Table 4–2 of the Wood Handbook gives the equilibrium moisture content for any temperature and relative humidity, and Table 13–2 gives the installation target by use and region. Between them you can put a defensible figure on the destination.
The practical route is to take the range rather than a point. Work out what the room does at its winter driest and its summer dampest, and you have the two numbers that matter. At 70 degrees F:
| Condition | Relative humidity | Equilibrium moisture content |
|---|---|---|
| Heated house, cold snap, forced air | 20 percent | 4.5 percent |
| Normal northern winter indoors | 30 percent | 6.2 percent |
| Shoulder season, conditioned | 45 percent | 8.5 percent |
| Comfortable summer, conditioned | 55 percent | 10.1 percent |
| Unconditioned summer, or a basement | 65 percent | 12.0 percent |
| Job site before the HVAC runs | 80 percent | 16.0 percent |
Two cautions the Handbook attaches to its own table. The values “were derived primarily for Sitka spruce under conditions described as oscillating vapor pressure desorption, which was shown to represent a condition midway between adsorption and desorption” — wood taking on moisture settles a little lower than wood giving it up, with a ratio around 0.8 near room temperature, so the table is a deliberate compromise. And it is an equilibrium: it says where the wood goes, not when it gets there.
Worked example 1 — a red oak strip floor that gapped
The job. 2‑1/4 in face flatsawn commercial red oak strip, laid tight across a 14‑ft room. Installed in August at 11 percent moisture content. By February the room is at 70 degrees F and 28 percent relative humidity and the owner is counting gaps.
Step 1, the coefficient. Commercial red oak, flatsawn, so the width is tangential: CT = 0.00369.
Step 2, the service moisture content. 70 degrees F at 28 percent RH sits between the printed 25 percent column (5.4) and the 30 percent column (6.2), so interpolating gives 5.4 + 0.6 × 0.8 = 5.88 percent.
Step 3, the change. 5.88 − 11 = −5.12 points.
Step 4, one board. ΔD = 2.25 × 0.00369 × (−5.12) = −0.0425 in. Call it 3/64 in — which is below what anybody would notice at one joint.
Step 5, the run. 14 ft is 168 in, which at 2.25 in per board is about 74 boards. 74 × 0.0425 = 3.15 in of total shrinkage distributed across 74 joints.
So each joint opens about 3/64 in — a credit-card gap — and the floor as a whole has lost over three inches of width, which has gone under the baseboards at both ends. Nothing failed. The mistake was upstream: installing at 11 percent in a house that winters at 5.9. Had the floor gone in at 8 percent, the winter change would have been 2.1 points instead of 5.1, and the gaps would have been under 1/64 in.
Worked example 2 — a 2×10 joist drying out under a finished floor
The job. Coast Douglas-fir 2×10 floor joists, actual 1‑1/2 by 9‑1/4 in, delivered KD‑19 and read at 17 percent when the subfloor went down. The house is heated, and the Handbook notes that joists over heated basements can reach 6 to 7 percent. Call the service condition 8 percent.
Which equation. 17 percent is outside the 6 to 14 percent band Equation 13–2 is published for, so this is an Equation 13–3 problem. Coast Douglas-fir has CT = 0.00267, and the total tangential shrinkage that corresponds to is 7.6 percent — the same figure Table 4–3 prints for it, which is a useful check that the two tables agree.
The arithmetic. ΔD = 9.25 × (8 − 17) / [30(100)/7.6 − 30 + 17] = 9.25 × (−9) / (394.7 − 13) = −83.25 / 381.7 = −0.218 in.
A little over 7/32 in of depth, gone, on every joist. The joist does not care — it loses almost no strength. What cares is everything fastened across it. The Handbook’s list is exact: “cracks in plastered walls, truss rise, open joints, and nail pops in dry-wall construction; distortion of door openings; uneven floors; and loosening of joints and fastenings.”
And it points at the right culprit: “The extent of vertical shrinkage after the house is completed is proportional to the depth of wood used as supports in a horizontal position, such as girders, floor joists, and plates.” Studs barely contribute — they shrink along their length, which is the direction wood does not move. It is the plates, the rim and the joists that drop a house.
Worked example 3 — a wide hard maple stair tread
The job. 11‑1/4 in flatsawn hard maple tread, housed into routed stringers at both ends. Shop at 55 percent RH and 70 degrees F; the finished stairwell runs from about 30 percent RH in winter to 60 in summer.
The three moisture contents. From Table 4–2 at 70 degrees F: shop at 55 percent RH is 10.1 percent; winter at 30 percent RH is 6.2; summer at 60 percent RH is 11.0.
Hard maple flatsawn is CT = 0.00353.
Winter. 11.25 × 0.00353 × (6.2 − 10.1) = −0.155 in. The tread shrinks about 5/32 in across its width.
Summer. 11.25 × 0.00353 × (11.0 − 10.1) = +0.036 in.
Total annual swing: 0.191 in, nearly 3/16 in, in and out of a housing at each end, every year, forever.
That is why treads are housed with a wedge rather than glued solid across the full width, and why the housing is cut deeper than the tread needs. If the tread is captured hard at both ends and the shrinkage cannot be taken up, the wood does not compress politely — it checks, or it pulls the glue line, or it splits from a riser screw.
Note also what the shop moisture content did. Building at 10.1 percent put the tread at the top of its annual range: it will almost only ever shrink. Building at 8.5 — between the two — would have split the 0.19 in into about 0.08 each way.
Worked example 4 — a cabinet door panel, and why it floats
The job. A flat panel in a frame-and-panel door, 12 in wide, cherry, flatsawn. Built in a conditioned shop at 8 percent. The kitchen runs 35 to 60 percent RH at 70 degrees F.
Moisture contents. 35 percent RH gives 6.9 percent; 60 percent RH gives 11.0 percent. Black cherry flatsawn is CT = 0.00248.
Dry end. 12 × 0.00248 × (6.9 − 8) = −0.033 in.
Damp end. 12 × 0.00248 × (11.0 − 8) = +0.089 in.
Total range: 0.122 in, about 1/8 in.
So the groove in the frame has to be deep enough to keep the panel captured when it shrinks 0.033 in, and loose enough not to burst the stiles apart when it grows 0.089 in. The traditional allowance — groove the frame a good 3/8 in deep, size the panel so it sits with about 1/16 in of free space at each edge, glue it nowhere — is not folklore, it is this arithmetic rounded up.
It also explains why cherry is loved for this and why a 12 in oak panel in the same door would be a different proposition: red oak at 0.00369 would give 0.133 in at the damp end alone, half as much again.
Frequently asked questions
What moisture content should lumber be at before I use it? It depends on the job and the region, and the Wood Handbook publishes both. Table 13–2 asks for 8 percent average for interior woodwork, flooring, furniture and trim across most of the United States, with individual pieces between 6 and 10; 6 percent average in the dry southwest; and 11 percent average in a damp warm coastal area. Exterior siding, trim and sheathing is 12 percent average in most of the country. Construction softwood is a different standard: an average of 15 percent and not to exceed 19.
How do I measure the moisture content of wood? With a pin-type resistance meter, driven into a freshly exposed face or a fresh crosscut end rather than through the weathered outside, because a board that has sat in dry air has a dry shell over a wetter core. Apply the meter’s species and temperature corrections. And take more than one reading: the Wood Handbook’s instruction for a realistic average is to test at least 10 percent of each item, giving the example that in a dwelling containing 60 floor joists, at least six should be tested at random.
How do I tell if a board is flatsawn or quartersawn? Look at the end grain. Rings running roughly parallel to the wide face, usually curving as they approach the edges, is flatsawn, and the face will show cathedral or flame figure. Rings standing roughly perpendicular to the face is quartersawn, and the face shows straight vertical grain. Rings at around 45 degrees is riftsawn. The distinction is worth making because it decides which of the two published coefficients governs the width, and they differ by between about 1.4 and 3 times depending on species.
Where does acclimation actually come from? From the wood equilibrating with the air around it, which means it only works if the air is at the condition the wood will live in. The Wood Handbook’s Table 4–2 is the map between air condition and the moisture content wood settles at, and acclimation is simply the process of getting from one point on that map to another. That is why leaving flooring in an unconditioned house does not acclimate it to anything useful: it equilibrates perfectly well, to the wrong number. The practical test is a meter reading against the Table 13–2 band, not the number of days the stock has been on site.
Does the species group on the grade stamp tell me enough? For softwood framing, usually yes. Within Southern Pine the four species in the Wood Handbook’s table run from 0.00259 to 0.00271 tangentially, which is a five percent spread and below the noise of the calculation. For hardwoods it is weaker: commercial red oak as a group is 0.00369, but overcup white oak on its own is 0.00462 and live oak is 0.00338, so an identifiable species beats a group figure where you can get one.
How accurate is this? The Wood Handbook publishes the answer: shrinkage variability runs at a coefficient of variation of approximately 15 percent for pure tangential or radial orientation, and probably more in commercial lumber where the ring orientation is rarely perfectly aligned. So a calculated 0.20 in should be read as roughly 0.17 to 0.23 on any individual board. The average of a quantity of boards is predicted well; one board is one board.
Does this apply to plywood or MDF? No. Every coefficient here is for solid wood. Plywood’s cross-banded plies restrain in-plane movement to a small fraction of solid wood’s, and MDF and particleboard behave differently again. Using a solid-wood coefficient on a sheet good overstates movement by close to an order of magnitude.
What about movement along the length of a board? Effectively none, and the Wood Handbook is clear about why it can be ignored: shrinkage “occurs primarily in the width and thickness of members, not the length.” The exception is cross grain and reaction wood, where longitudinal shrinkage rises and becomes unpredictable, which is a warp problem rather than a dimension problem.