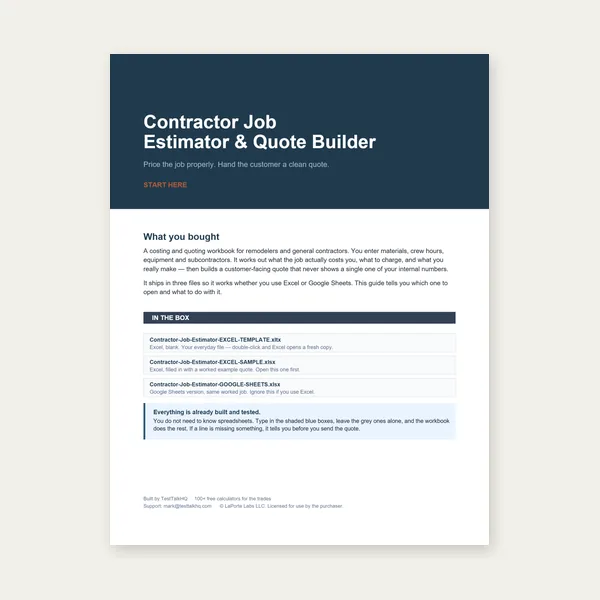
Contractor Job Estimator
Price remodels and GC work, then send a quote with no internal numbers.
Excel or Google Sheets. Best on a computer.
$29.00
BuyKerf spacing, true-shape DXF nesting, quality presets, and exports
This walkthrough covers the 2D Sheet Nesting Optimizer from sheet setup through Auto-nest, reading yield stats, and choosing PDF vs DXF vs CSV. Cutting bar or tube to length is a separate 1D problem — use the Cut List Optimizer and its guide for that.
Set sheet size, add parts (rectangles, circles, or DXF uploads), hit Auto-nest, then drag pieces to fine-tune. Export PDF, DXF, or CSV when the layout looks right.
Open 2D Sheet Nesting Optimizer →Start with a preset (4×8 ft, 4×10 ft, 5×10 ft, or 1250×2500 mm) or enter custom width and height. Switch between inches and millimeters — kerf converts with the unit change (metric presets default to 3 mm gap; imperial defaults to 0.125 in).
Kerf/gap is the minimum clearance the tool enforces between part outlines — the material lost to the cut kerf plus any shop spacing you want between neighbours. For rectangles and circles the engine inflates each part footprint by kerf on all sides, so two 10 in × 10 in pieces with 0.125 in kerf behave like 10.125 in squares with a 0.125 in gutter between them. For DXF true-shape parts, kerf is enforced as outline-to-outline distance (mathematically equivalent to offsetting each shape by half the kerf).
Each row is a part name, shape type, size, quantity, and a Rotate checkbox that lets the auto-nester try 90° rotation (rectangles only). For circles, Width is the diameter. Upload a DXF per part to nest the real profile — the tool detects bounding size and whether it parsed a closed outline or fell back to a convex hull (see the troubleshooting article if you see convex-hull boundary in the parts table).
After Auto-nest you can drag any placed piece, rotate with the round handle above it (any angle; hold Shift for 15° snaps), press R or double-click for a quick 90°, drag off the sheet to remove, and use Ctrl+Z to undo.
Most quick nesting tools pack bounding boxes — the smallest axis-aligned rectangle around each part. That is fast and correct for plain rectangles and circles, but it ignores concavity: an L-bracket’s empty corner cannot tuck into another part’s pocket, and a ring wastes the hole in the middle.
True-shape nesting (True Shape = On when at least one DXF part is present) places parts by their real polygon outline. Two concave L-brackets can interlock; a small tab can sit inside a larger part’s cutout; a diagonal bar that fails the bounding-box oversize check may still fit at 45°. The tool runs both the fast MaxRects bounding-box packer and the irregular outline engine head-to-head and keeps whichever result places more parts on fewer sheets — true-shape mode cannot give you a worse sheet count than bounding-box alone.
Turn True Shape Off only when you deliberately want faster packing by bbox (e.g., rough quoting) or when your DXF is unreliable and you are sizing by envelope. For cut accuracy and yield on concave parts, fix the DXF and leave True Shape On — details in Common 2D Nesting Problems and Fixes.
Nest effort only affects jobs that include a DXF part (true-shape path). Rectangle/circle-only jobs always use the fast bounding-box engine at 90° steps.
| Preset | Angle step | Typical use | Runtime |
|---|---|---|---|
| Fast | 90° | Quick layout checks, simple outlines, many parts | Usually under a few seconds |
| Balanced | 45° | Default for most DXF jobs — good yield vs wait | A few seconds on medium jobs |
| Thorough | 15° | Tight nests, diagonal fits, mixed concave sets | 10s+ on large jobs; may hit time budget |
Thorough searches more rotation angles and more candidate positions per part. On very large true-shape jobs the engine may report time budget hit — reduced angle search — it still finishes with a valid layout, but may miss a slightly better angle. If you see that message often, drop to Balanced or split the part list. See Auto-Nest vs Manual Nesting for when to hand-tune after Auto-nest instead of chasing Thorough every time.
The stat bar updates live as you nest and drag:
PDF — shop packet: proportional sheet diagram, part labels, summary stats. Print it for the brake operator or tape it to remnant rack. Best for human verification before cutting.
DXF (this sheet) — geometry for CAM/post: exports the current sheet tab’s placed outlines (including rotation) so you can import into laser, plasma, or router software. Use after you are happy with the nest on that sheet; re-export if you move parts.
CSV — spreadsheet-friendly placement list (part name, sheet index, x/y, rotation, dimensions) for ERP, quoting, or custom scripts. Handy when PDF is for people and CSV is for systems.
Typical flow: Auto-nest → hand-tweak if needed → PDF for the floor → DXF per sheet for the machine → optional CSV for job tracking → Cut-Cost & Time Estimator on the DXF or total cut length for quoting.
Bar, tube, angle, and lumber jobs are one-dimensional: you care about length along stock and kerf between cuts. The Cut List Optimizer handles remnants, standard lengths, and PDF/CSV cut lists — read the Cut List Optimizer Guide for kerf and layout diagrams.
Plate, sheet metal, plywood, and flat blanks are two-dimensional: parts have width and height (or arbitrary outlines) and pack across a sheet face. That is what this tool is for. Many fab jobs use both — tube cut lists from the 1D tool and plate nests from the 2D tool.
Price remodels and GC work, then send a quote with no internal numbers.
Excel or Google Sheets. Best on a computer.
$29.00
BuyCheckout opens here — you stay on this page.