Look, if you’ve ever stood in front of a welder wondering “how many amps do I actually need for this thickness,” you’re not alone. I’ve been fabricating for 10 years, and I still see people struggling with this basic question.
The problem? Every welding process needs different amperage for the same material. MIG runs hotter than TIG. Stick falls somewhere in between. And all the “rules of thumb” you hear only work for one process under ideal conditions.
Here’s what you actually need: a straightforward amperage chart that covers MIG, TIG, and Stick welding, breaks down settings by material thickness, and tells you what size welder you need to get the job done.
That’s what this guide does. No theory. No textbook formulas. Just the amperage ranges that work in real shops, plus the machine sizing info you need when you’re buying equipment.

Why Amperage Matters (And Why It’s Different for Each Process)
Amperage controls heat input. More amps = more heat = deeper penetration. But here’s the catch: the three main welding processes deliver that amperage completely differently.
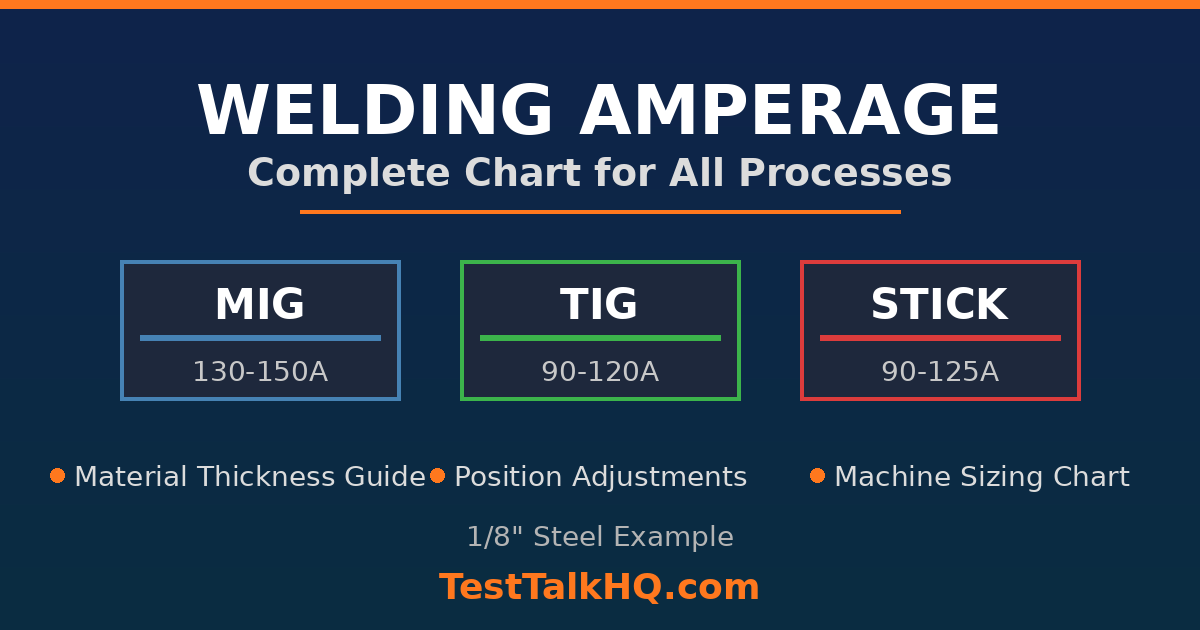
MIG Welding: You don’t directly set amperage. You set wire feed speed, and that determines your amperage. Faster wire speed = more amps. A typical MIG setup for 1/8″ steel might draw 130-150 amps, but you’ll dial in wire speed (around 300 IPM) and voltage (around 19V) to get there.
TIG Welding: You directly control amperage with a foot pedal or fingertip control. You’re working with a tungsten electrode that doesn’t melt, so you can modulate heat precisely. Same 1/8″ steel might only need 90-120 amps because TIG is so focused and efficient.
Stick Welding: You set amperage on the machine based on rod diameter. A 1/8″ 7018 rod runs around 90-125 amps depending on position. The rod coating and arc characteristics affect how that amperage translates to actual heat input.
This is why generic amperage advice falls apart. Saying “use 125 amps for 1/8″ steel” doesn’t help if you don’t know which process you’re using.
The Master Amperage Chart: All Three Processes
Interactive tool: Use our Welding Amperage Calculator to look up the same MIG, TIG, Stick, and flux-core ranges by thickness and material — without scrolling the table below.
Here’s what you came for. Amperage ranges for mild steel across MIG, TIG, and Stick welding. These are starting points—you’ll adjust based on position, joint design, and specific conditions.
| Material Thickness | MIG Amperage | TIG Amperage | Stick Amperage |
|---|---|---|---|
| 16 gauge (0.060″) | 40-60 amps | 30-50 amps | Too thin for stick |
| 14 gauge (0.075″) | 50-75 amps | 40-60 amps | Too thin for stick |
| 11 gauge (0.120″) | 80-110 amps | 70-90 amps | 60-80 amps (3/32″ rod) |
| 1/8″ (0.125″) | 130-150 amps | 90-120 amps | 90-125 amps (1/8″ rod) |
| 3/16″ (0.1875″) | 150-180 amps | 120-160 amps | 125-165 amps (5/32″ rod) |
| 1/4″ (0.250″) | 180-220 amps | 160-200 amps | 150-200 amps (5/32″ rod) |
| 3/8″ (0.375″) | 220-280 amps | 200-250 amps | 170-220 amps (3/16″ rod) |
| 1/2″ (0.500″) | 280-350 amps | 250-300 amps | 200-250 amps (3/16″ rod) |
Want process-specific settings? Use the MIG Welding Calculator, TIG Welding Calculator, or Stick Welding Calculator for exact recommendations based on your material, wire size, and position.

Understanding the Differences Between Processes
Notice how TIG consistently uses less amperage than MIG for the same thickness? That’s not a typo. Here’s why each process needs different heat input.
MIG Welding Amperage Characteristics
MIG runs hot because you’re continuously feeding wire into the puddle at high speed. That wire is cold when it enters the arc, so you need extra amperage to melt it and the base material simultaneously.
The faster your wire feeds, the more amperage you’re drawing. For 1/8″ steel with 0.035″ wire, you might run 300 IPM wire speed, which translates to about 140 amps. But you don’t dial in “140 amps” directly—you dial in wire speed and voltage, and the amperage is the result.
This is why MIG is fast. You’re depositing a lot of filler metal quickly, which requires higher heat input. But it also means MIG is less precise on thin material. Drop below 16 gauge and you’re fighting burn-through constantly.
Check out the MIG Calculator to convert material thickness into actual wire speed and voltage settings for your machine.
TIG Welding Amperage Characteristics
TIG is more efficient with amperage because the tungsten electrode doesn’t melt. All your heat goes into the base material and filler rod—nothing is wasted melting the electrode itself.
You also have precise control. That foot pedal or fingertip control lets you ramp amperage up and down on the fly. Starting a bead on 1/8″ steel? You might start at 100 amps to establish the puddle, then back off to 80 amps to avoid overheating as you travel.
This precision comes with a tradeoff: TIG is slow. You’re manually feeding filler rod with one hand while controlling heat with your foot. But for thin material, critical welds, or anything requiring finesse, TIG’s lower amperage requirements are a huge advantage.
The TIG Calculator helps you dial in amperage, tungsten size, and gas flow based on material type and thickness.
Stick Welding Amperage Characteristics
Stick falls between MIG and TIG in terms of amperage requirements. You’re melting both the rod and the base material, but the arc isn’t as hot and concentrated as MIG’s spray transfer.
Rod diameter determines your amperage range. A 1/8″ 7018 rod runs 90-125 amps. Go up to 5/32″ and you need 125-185 amps. The coating on the rod affects how the arc behaves, which is why different rod types (6010 vs 7018) can need slightly different settings for the same diameter.
Position also matters more with stick than the other processes. Welding vertical-up? Drop your amperage 10-15% from flat settings or the puddle sags. Overhead? Drop another 5-10%.
Use the Stick Calculator to get amperage recommendations based on rod type, diameter, and position.
Material Type: How It Changes Amperage Requirements
That chart above is for mild steel. Switch materials and everything changes. Here’s what you need to know.
Stainless Steel
Stainless conducts heat poorly compared to mild steel. That means heat builds up in the weld zone instead of dissipating into the surrounding material. You need about 10-15% less amperage than mild steel to avoid warping and burn-through.
For 1/8″ stainless steel:
- MIG: 115-135 amps (vs 130-150 for mild steel)
- TIG: 75-105 amps (vs 90-120 for mild steel)
- Stick: 80-110 amps (vs 90-125 for mild steel)
Travel faster with stainless too. If you sit in one spot, you’ll overheat the material and cause excessive distortion. Keep moving to spread the heat out.
Aluminum
Aluminum is the opposite of stainless. It conducts heat exceptionally well, sucking heat away from the weld zone like a sponge. You need 25-35% MORE amperage than mild steel for the same thickness.
For 1/8″ aluminum:
- MIG: 165-190 amps (aluminum MIG requires spool gun or push-pull system)
- TIG: 115-155 amps on AC (you MUST use AC for aluminum TIG)
- Stick: Rarely used for aluminum, specialized rods required
Aluminum also forms an oxide layer instantly when exposed to air. That oxide melts at 3,700°F while the aluminum itself melts at 1,200°F. This is why AC is required for TIG aluminum—the alternating current breaks up the oxide layer while welding.
Machine Sizing: What Amperage Rating Do You Actually Need?
Here’s the question everyone asks when buying a welder: “How many amps do I need?” The answer depends on the thickest material you plan to weld regularly.
120V Welders (20-140 Amps)
These plug into a standard household outlet. They’re limited by the 15-20 amp circuit capacity.
Good for:
- Sheet metal (16ga to 14ga)
- Light fabrication (up to 1/8″ with multiple passes)
- Automotive bodywork
- Hobby welding
Process limitations:
- MIG: Up to 1/8″ in one pass, 3/16″ with multiple passes
- TIG: Up to 3/16″ effectively
- Stick: Limited to 1/16″ and 3/32″ rods, not ideal
Don’t expect to weld 1/4″ plate with a 120V machine. You can do it with multiple passes, but it’s slow and you’ll be at the limit of the machine’s duty cycle.
240V Welders (140-200 Amps)
These require a 240V circuit (usually 30-50 amp breaker). This is the sweet spot for most home shops and small businesses.
Good for:
- General fabrication up to 1/4″ in one pass
- Structural welding
- Most automotive chassis work
- Light industrial applications
Process capabilities:
- MIG: Up to 3/8″ in one pass with .035″ wire
- TIG: Up to 1/4″ steel, 3/16″ aluminum
- Stick: 1/8″ and 5/32″ rods comfortably
A 200-amp machine covers 90% of what most welders do. If you’re building trailers, gates, railings, or general steel structures, this is your range.
240V Welders (200-300+ Amps)
Professional grade. These machines handle heavy fabrication, thick material, and all-day production work.
Good for:
- Heavy fabrication (1/2″ and thicker)
- Production welding
- Pipe welding
- Industrial maintenance
Process capabilities:
- MIG: Unlimited for practical purposes, can run .045″ wire at high speeds
- TIG: Up to 1/2″ steel, 3/8″ aluminum
- Stick: 3/16″ and 1/4″ rods all day
These machines cost more, require bigger electrical service, and are overkill for most hobbyists. But if you’re running a fabrication business or working on heavy equipment, the capability is worth it.
Duty Cycle: Why Your Welder’s Amperage Rating Isn’t the Whole Story
Every welder has a duty cycle rating. This tells you how long you can weld at a given amperage before the machine needs to cool down.
Example: A welder rated for “140 amps at 20% duty cycle” can weld for 2 minutes out of every 10 at 140 amps. The other 8 minutes, it’s cooling down.
This matters more than you think. If you’re doing production work or long continuous welds, a machine with a 20% duty cycle at max amperage will constantly overheat and shut down. You need a higher duty cycle rating or a bigger machine.
Typical duty cycles:
- Hobby machines: 20% at max amps, 35-40% at reduced amps
- Pro-sumer machines: 30-40% at max amps, 60% at reduced amps
- Industrial machines: 60% at max amps, 100% at reduced amps
If you’re welding at 60-70% of the machine’s max amperage, your duty cycle effectively doubles or triples. That 140-amp machine with 20% duty cycle at max? It might run 60% duty cycle at 100 amps.
For most hobby and small shop work, duty cycle isn’t a big deal. You’re not welding continuously for 10 minutes straight. But if you are, size your machine accordingly.
Electrical Requirements: Matching Your Welder to Your Power
Before you buy a welder based on amperage ratings, make sure you can actually power it. Here’s what you need to know.
120V Circuits
Standard household outlets are usually 15 or 20 amps. That limits you to about 1,800 watts (15A × 120V) or 2,400 watts (20A × 120V).
A 120V welder pulling 140 amps output is drawing about 20 amps input at the plug. You need a dedicated 20-amp circuit—don’t run it on the same circuit as your lights and outlets or you’ll trip breakers constantly.
240V Circuits
These require dedicated circuits with appropriate breaker sizes:
- 30-amp breaker: Supports welders up to about 180 amps output
- 40-amp breaker: Supports welders up to about 220 amps output
- 50-amp breaker: Supports welders up to 250+ amps output
Check your welder’s specs for required input amperage, not output amperage. A 200-amp output welder might only draw 30-40 amps from the wall because of the duty cycle and transformer efficiency.
If you’re setting up a shop, run 240V 50-amp service to your welding area. This gives you headroom to upgrade machines later without redoing electrical.

Position Adjustments: How Amperage Changes Out of Flat
All the amperage numbers I’ve given you assume flat welding. Change position and you need to adjust. Gravity works against you in vertical and overhead, so you need less heat to keep the puddle controllable.
General position adjustments:
| Position | Amperage Adjustment | Why |
|---|---|---|
| Flat (1G) | Baseline (100%) | Gravity helps hold puddle |
| Horizontal (2G) | Reduce 5-10% | Puddle wants to sag slightly |
| Vertical-Up (3G) | Reduce 15-20% | Puddle fights gravity |
| Vertical-Down (3G) | Reduce 25-30% | Gravity pulls puddle ahead |
| Overhead (4G) | Reduce 20-25% | Puddle wants to fall out |
Example: You’re welding 1/8″ steel flat with MIG at 140 amps. Switch to vertical-up and you should drop to about 115-120 amps. The puddle needs to stay thick and controllable, not fluid and runny.
TIG welders have an advantage here because you can feather the pedal constantly to maintain puddle control. MIG and stick require you to adjust machine settings before you start welding.
Joint Design: How It Affects Required Amperage
The charts assume butt joints with proper fit-up. Change the joint design and you need different heat input.
Fillet welds (T-joints, lap joints): Heat sinks into two pieces of metal instead of one. You typically need 10-15% more amperage than a butt joint on the same thickness material.
Corner joints: Similar to fillet welds. Two pieces conduct heat away, so you need more amperage to maintain proper penetration.
Edge joints: Less mass to sink heat, so you can often reduce amperage 5-10% from butt joint settings.
Plug welds: Concentrated heat in a small area. Watch for burn-through and consider dropping amperage slightly.
This is where experience comes in. The calculators and charts get you close, but you still need to watch the puddle and adjust based on what you’re seeing.
Common Amperage Mistakes (And How to Fix Them)
Mistake #1: Using MIG Amperage for Stick Settings
I see this all the time. Someone hears “use 125 amps for 1/8 inch steel” and sets their stick welder to 125 amps with a 1/8″ rod. Then they wonder why they’re blowing through the material.
That 125-amp rule is probably a MIG setting. Stick welding the same thickness typically needs 90-110 amps. Check which process the recommendation is for before you blindly follow it.
Mistake #2: Maxing Out a Machine Constantly
You bought a 140-amp machine, so you run it at 140 amps all the time, right? Wrong. You’ll overheat the machine, trigger thermal shutdowns, and reduce its lifespan.
Run machines at 60-80% of their rated capacity for consistent, reliable performance. If you regularly need 140 amps, you need a 180-200 amp machine.
Mistake #3: Ignoring Duty Cycle
Your machine keeps shutting down mid-weld. Frustrating, right? That’s the duty cycle protection kicking in. You’re either welding too long continuously or running at too high an amperage for the machine’s rating.
Solution: Take breaks between welds to let it cool, or upgrade to a machine with a higher duty cycle rating at your required amperage.
Mistake #4: Not Adjusting for Position
Your flat welds look great, but your vertical welds are a mess. The puddle sags, you get undercut, and the bead looks like it’s melting off the plate.
You’re running too hot. Drop your amperage 15-20% for vertical work and maintain tighter travel technique. The welding calculators automatically adjust for position—use them.
Mistake #5: Wrong Material Calculations
Aluminum welds are coming out cold and ropey even though you’re using the “right” settings for steel. That’s because aluminum needs 25-35% more heat than steel.
Always select the correct material type in your calculator or reference charts. Material properties make a huge difference in required amperage.
How to Dial In Perfect Amperage Every Time
Here’s my process for setting amperage on any job:
Step 1: Identify your variables
- Material type (mild steel, stainless, aluminum)
- Material thickness (measure accurately)
- Welding process (MIG, TIG, or Stick)
- Position (flat, horizontal, vertical, overhead)
- Joint design (butt, fillet, corner, etc.)
Step 2: Use the appropriate calculator
- Welding Amperage Calculator — amp range by thickness, process, and material (same chart data)
- MIG Calculator for wire speed and voltage
- TIG Calculator for amperage and tungsten size
- Stick Calculator for rod size and amperage
Step 3: Set your machine to the middle of the recommended range
Don’t start at the high end or low end. Start in the middle and adjust from there based on what you see in the puddle.
Step 4: Run a test bead on scrap
Don’t practice on your actual workpiece. Use scrap material of the same thickness to dial in your settings.
Step 5: Evaluate and adjust
- Too hot: Burn-through, excessive spatter, very flat wide bead → Reduce amperage
- Too cold: Poor penetration, ropey bead, wire stubbing → Increase amperage
- Just right: Good penetration, consistent bead shape, minimal spatter → Write these settings down
Step 6: Document your settings
Keep a notebook of proven settings for common jobs. Once you dial something in perfectly, you don’t need to recalculate every time you weld that same material and thickness.
Buying Guide: Matching Machine Amperage to Your Needs
If you’re shopping for a welder, here’s how to determine what amperage rating you actually need.
Ask yourself:
- What’s the thickest material I’ll weld regularly?
- What process will I use most (MIG, TIG, or Stick)?
- Will I weld continuously or intermittently?
- Do I have 120V or 240V power available?
General recommendations:
Hobby welding, automotive bodywork, sheet metal: 120V machine, 100-140 amps. You’ll handle up to 1/8″ steel comfortably.
Home shop, general fabrication, trailers, gates: 240V machine, 180-200 amps. This covers up to 1/4″ steel in single pass, 3/8″ with multiple passes.
Professional fabrication, heavy structural work: 240V machine, 250-300 amps. You’ll handle anything up to 1/2″ steel and run larger stick rods or heavy MIG wire.
Production welding, industrial maintenance: 300+ amps with high duty cycle ratings. At this level, you’re looking at industrial-grade machines.
When in doubt, buy more machine than you think you need. It’s better to have excess capacity than constantly max out a machine that’s too small.

When the calculator result and the shop disagree, see Welding Amperage Troubleshooting.
Final Thoughts on Welding Amperage
Look, amperage isn’t complicated once you understand the differences between processes and account for material type, thickness, and position. The charts in this guide give you solid starting points.
But here’s the reality: you still need to run test beads and adjust based on what you’re seeing. No chart or calculator can account for every variable—your specific machine, your technique, your material condition, your travel speed.
Use the numbers as a baseline. Then trust your eyes and the puddle behavior to tell you what adjustments to make. That’s how you go from “sort of okay” welds to consistently good ones.
For process-specific settings tailored to your exact setup, check out the calculators:
And for more welding resources, visit the Welding Calculators and Tools hub page.
Now go set your amperage right and lay down some good beads.
Disclaimer: Always follow manufacturer recommendations, welding procedures, and safety protocols. This guide is for educational purposes. For critical applications, consult qualified welding engineers and follow applicable codes. See our full disclaimer.
Stick settings in depth: Pair this chart with the Stick Welding Settings Guide and Stick Welding Calculator for electrode-diameter amps, position derates, and dig recommendations. For MIG parameter logic, see the MIG Welding Settings Guide.