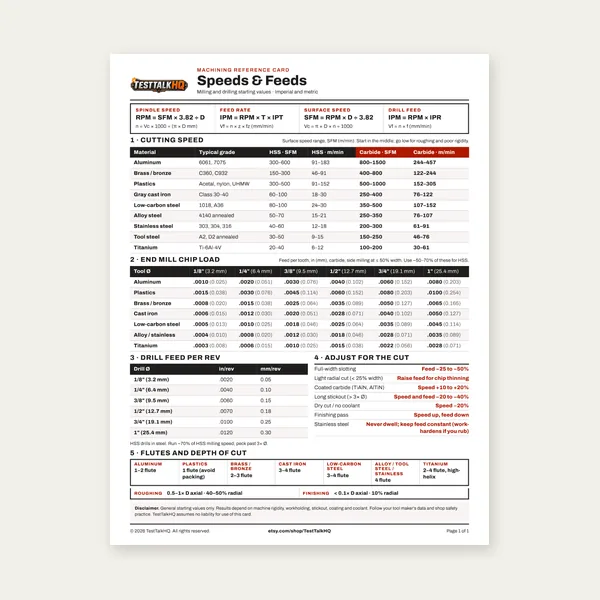
Machining Speeds & Feeds Card
One page. Speeds, chip load and drill feed, imperial and metric.
$3.99
BuyRPM & Feed Rate for Any Material
Enter your bore diameter, material, and bar type to get recommended RPM, feed rate, and depth of cut instantly.
A boring bar is a single-point cutting tool used on a lathe or boring mill to open up an existing hole to a precise diameter and finish — it is the right tool when a drill leaves too rough a surface or cannot hold the tolerance you need. Running the wrong RPM or feed rate on a boring bar costs you finish, accelerates tool wear, and produces the chatter that ruins a workpiece you may have hours of setup time in. Enter your parameters above to get the numbers before you cut.
One page. Speeds, chip load and drill feed, imperial and metric.
$3.99
Buy
27 pages. Milling, drilling, tapping, turning and CNC routing.
$12.99
Buy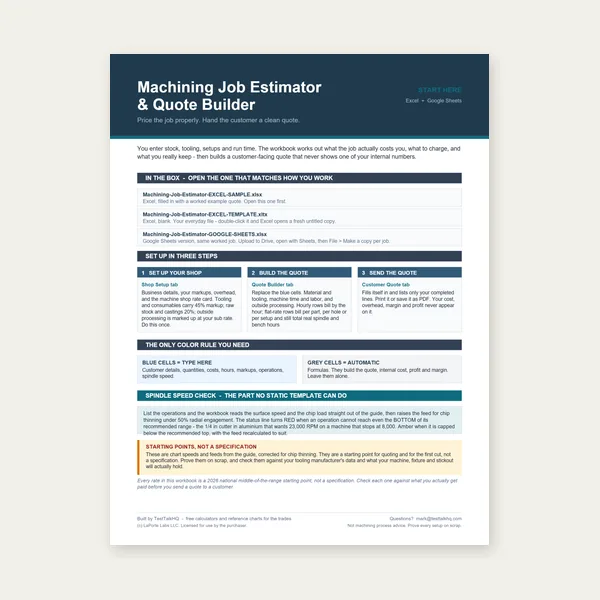
Quote shop work and check operations against your spindle's top speed.
Excel or Google Sheets. Best on a computer.
$29.00
Buy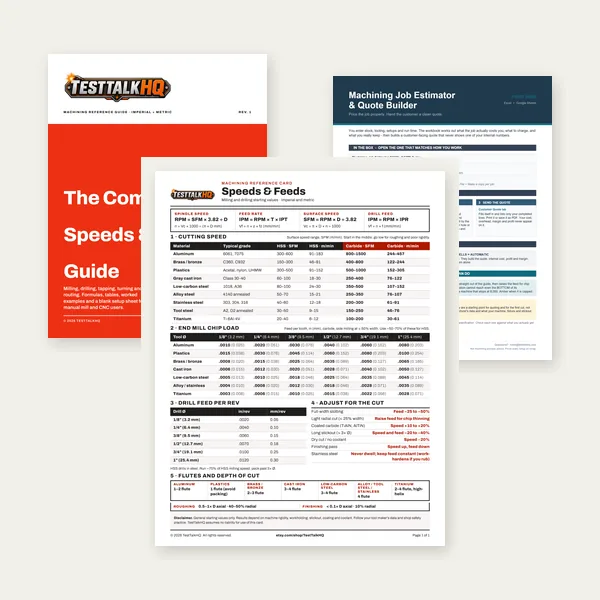
Card, 27-page guide and the estimator workbook. All six files.
Excel or Google Sheets. Best on a computer.
$34.99
$45.98 if bought separately — save $10.99
BuyCheckout opens in a new tab.
Five indexable boring bar sets and SCLCR bars from the live catalog — matched to the RPM, feed, and L/D outputs above
As an Amazon Associate, TestTalkHQ earns from qualifying purchases.
Boring is the operation of enlarging an existing hole using a single-point cutting tool, typically to achieve a diameter tolerance and surface finish that drilling or reaming alone cannot deliver. You reach for a boring bar when you need a non-standard diameter, better roundness than a drill provides, or you are fitting a bearing or bushing to a specific class of fit. Boring also corrects position errors from the drilled hole — something reaming cannot do. If your tolerance is tighter than ±0.002", boring is likely the right operation.
RPM is the spindle speed to set before cutting — always round down on a boring bar if your machine lacks the exact speed. Feed Rate (IPR) controls how far the bar advances per revolution; too light a feed on stainless or steel causes rubbing and work-hardening. Depth of Cut is shown for both roughing and finishing so you have both values available. The L/D Ratio and Chatter Risk output is the one most machinists skip — do not skip it. It tells you whether your current setup is physically capable of producing a clean bore.
Chatter happens when cutting force exceeds bar stiffness, creating a resonant vibration cycle that marks the bore wall. L/D ratio — bar overhang divided by bar diameter — is the key variable. Under 3:1 is stable. Between 3:1 and 4:1, reduce feed and depth of cut. Above 4:1, shorten stick-out, move to a larger diameter bar, or use an anti-vibration damped boring bar. Counterintuitively, too light a feed can cause chatter by letting the insert rub rather than cut — if you see chatter, try increasing feed slightly before reducing RPM.
Tool height is non-negotiable — the boring bar tip must be exactly on the bore centerline. Even 0.010" high creates conditions that promote chatter and poor finish. Always leave 0.010"–0.030" for a dedicated finishing pass and follow it with a spring pass at zero additional infeed — the bar deflects under load and the spring pass picks up 0.001"–0.003" the first pass left behind. Match your insert grade to the material; a wrong-grade insert chatters at any RPM. Use cutting fluid aggressively on the finishing pass to prevent chip welding on the insert face.
Use 150–250 SFM for stainless with carbide inserts — the calculator uses 200 SFM by default. Stay toward the lower end if you are seeing rubbing or built-up edge. Sharp positive-rake inserts and aggressive cutting fluid matter more than chasing the top of the SFM range on stainless.
Always round down on a boring bar. Excess speed amplifies chatter far more than it improves productivity. The difference in surface footage between adjacent speed steps is modest; the difference in chatter risk is not.
Shorten your bar stick-out first. Pull the bar in as far as your boring depth allows. If you cannot shorten it, move to a larger-diameter bar if bore clearance allows, or source an anti-vibration damped bar for that diameter. Reducing RPM 15–20% and increasing feed rate slightly can also break the resonant frequency cycle.
Leave 0.010"–0.030" for the finishing pass — enough that the insert is making a real cut, not rubbing. After the first finishing pass, take a spring pass at the same setting with no additional infeed. The spring pass picks up 0.001"–0.003" the bar deflected on the first pass.
Chatter, poor ID finish, size drift, insert chips, or packed chips: Boring Bar Troubleshooting. Solid vs indexable vs boring head vs damped: Boring Bar Types — Which for the Job.