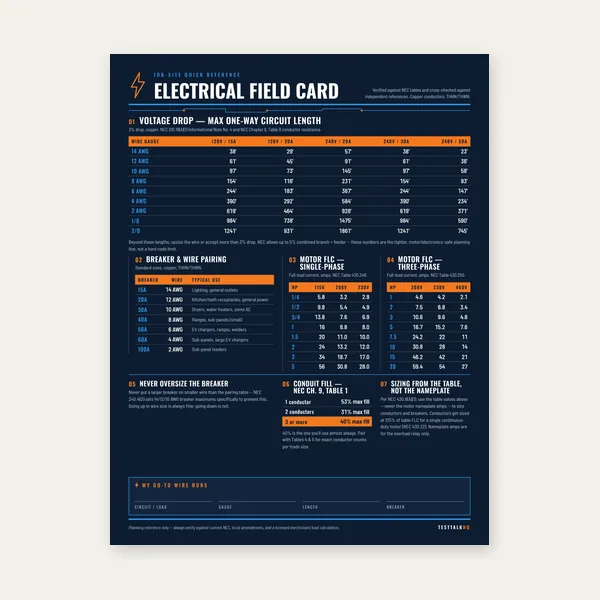
Electrical Reference Card
One page. Voltage drop lengths, breaker and wire pairing, motor FLC.
$3.99
BuyStub-Up, Offset, Saddle & Box Offset Bends Explained
The four bends every electrician needs on a bender head — how to mark them, how to read shrinkage, and how to stop wasting sticks in the field.
Every conduit run eventually needs more than a straight stick. Four bends cover the majority of commercial and residential work. Learn the math once, verify with a tape, and you stop guessing on every stub and offset.
A stub-up is a single 90° bend that brings the conduit vertical — into a box, up a wall, or off a slab. You measure the desired stub height from the floor (or reference surface) to the centerline of the conduit at the top of the bend. Mark the pipe at stub height minus the bender deduct, align the arrow on that mark, and bend to 90°. On standard EMT benders, the deduct for 1/2" and 3/4" is typically 5"; 1" is 6". The conduit shrinks roughly 5/8" along the original axis on a 90° stub — account for that when measuring between consecutive bends. The gain multiplier 2.718 applies when you need the developed length between parallel 90s or when calculating shrink on back-to-back bends: multiply the center-to-center distance by 2.718 to find the mark spacing on the conduit before bending.
Two 90° bends in the same plane create a U or return. Measure center-to-center between the two vertical legs, multiply by 2.718, and that is your distance between bend marks on the straight stick. Bend the first 90, roll or flip the pipe, measure from the first bend, place the second mark, and bend again. If the legs are not parallel when you set them, your center-to-center measurement was taken wrong or you used the wrong deduct on the stubs.
An offset clears an obstacle while keeping the run parallel to the original path. Measure the obstruction height, pick your bend angle, and multiply height by the bender multiplier to get the distance between the two bend marks:
Place the first mark, bend to angle, measure the calculated distance, place the second mark, and bend the same angle in the same direction. Shrinkage along the run equals the spacing minus the offset height — always add shrink when measuring between fixed points like boxes.
A 3-point saddle clears a round obstruction — another pipe, a beam, or a duct — without kinking the run. Mark the center of the obstacle on the conduit. The center bend is typically 45° (sometimes 60° on tight clearance). Side bends are 22.5° in the opposite direction. Distance from the center mark to each side mark equals obstacle height times the saddle constant (approximately 2.4× for a 45° center with 22.5° sides). Bend center first, then each side. Shrinkage depends on center angle — budget roughly 3/4" on a standard 45° center saddle and verify against your bender chart.
Entering the top or bottom of a box without scraping the plaster ring is a 4-point saddle: two 22.5° bends in the same direction, spaced about 2.5" apart on 1/2" EMT for a typical 1/2" box offset. Mark both bends, bend 22.5° at the first mark, roll 180°, bend 22.5° at the second mark in the same direction. The result is a smooth kick into the box throat without a full 90° that eats wall space.
Every hand bender stamps reference marks on the head. Using the wrong mark is the fastest way to miss a stub by 3" and cut a new stick.
Arrow (↓): Use for stub-ups, offsets, and most standard bends. Place the arrow on your calculated mark, bend toward the toe of the bender.
Star (★): Back-of-bend mark for 90° bends when measuring from the finished bend back toward the pipe end — common on back-to-back layouts and when the deduct method does not apply.
Teardrop (▼): Center-of-saddle mark. Align the teardrop on the center of the obstruction before bending the center 45° (or 60°).
Back of bender (solid line): Used for saddles and some offset sequences when the bend center must align with a mark on the rear of the shoe. Check your bender's stamped legend — Klein, Ideal, and Greenlee place marks slightly differently.
Rule: know which mark your calculation references before you ink the pipe. Mixing arrow math with star alignment will never land a box offset clean.
Shrinkage is how much shorter the run becomes along the original axis after bending. Add shrink when measuring between fixed points (box to box, box to beam). Values below are approximate per inch of offset height or standard constants for 90° work — verify against your bender manufacturer's chart for the trade size you are bending.
| Bend type / angle | Multiplier or constant | Typical shrinkage |
|---|---|---|
| 90° stub-up | Deduct method | 5/8" per 90° |
| Back-to-back 90s | × 2.718 C-C spacing | 5/8" per 90° (×2) |
| 10° offset | × 6.0 | ~1/16" per inch of height |
| 22.5° offset | × 2.6 | ~3/16" per inch of height |
| 30° offset | × 2.0 | ~1/4" per inch of height |
| 45° offset | × 1.4 | ~3/8" per inch of height |
| 60° offset | × 1.1 | ~1/2" per inch of height |
| 3-point saddle (45° center) | Side marks ~2.4× height | ~3/4" typical |
| Box offset (2 × 22.5°) | Marks ~2.5" apart | ~1/4" typical |
Dog legs: The second bend is not in the same plane as the first. Fix by sighting down the pipe before the second bend, use a level on the handle, or rotate the conduit in the bender shoe until the first bend plane matches your body line. On offsets, both bends must be the same angle in the same rotational direction.
Over-bend / under-bend: EMT springs back slightly; rigid springs less. Bend a few degrees past target on EMT, check with a level or angle finder, and correct while still in the shoe. Under-bending an offset leaves the run kinked; over-bending opens the spacing and misses the obstacle clearance.
Incorrect shrinkage: Measuring box-to-box without adding shrink is the most common layout error. After calculating offset spacing, add shrink to your total run length. For consecutive bends, stack shrink — two 90s add roughly 1-1/4" total shrink on standard EMT.
Wrong deduct: Using the 1/2" deduct on 1" EMT misses stubs by an inch. Match deduct to trade size and bender manufacturer. When in doubt, make a test bend and measure the stub that actually landed.
The multipliers and deduct formulas are the same — geometry does not change. What changes is the tool and the feel. EMT is bent on a hand bender with published deduct tables; it spring-backs, so experienced benders slightly over-bend. Rigid (RMC) uses hydraulic or Chicago-style benders with a larger centerline radius; deduct values are different and stamped on the bender — do not use EMT deducts on rigid. PVC is heated and bent; there is no deduct on a hand shoe — you form it around a heated template or use factory sweeps. Shrink and multiplier math still describes the layout, but PVC field bends are angle-and-eyeball work, not arrow-on-mark work.
For stub-up, offset, saddle, and box-offset mark distances with your trade size deduct built in, use the TestTalkHQ Conduit Bending Calculator before you cut your stick. Also see Tube Bending Calculator — CLR, Arc Length & Bend Deduction and Tube Bending Guide — CLR, Wall Thickness & Springback.
For multi-bend mark layouts (offset, saddle, rolling, segmented 90°) with printable cheat sheets, use the Conduit Bending Layout Generator. Bend-type selection: Layout Guide. Field failures: Layout Troubleshooting. Flat vs rolling: Offset vs Rolling Offset.
When a bend fails after layout — wrong finished angle, kink, dog-leg, short stick, or uneven segment sweep — use Conduit Bending Troubleshooting. Choosing hand vs hydraulic vs segment tooling: Conduit Bender Types — Which for the Job.
On most hand benders (Klein, Ideal, Greenlee), the deduct for 3/4" EMT is 5 inches. To lay out a stub-up, subtract 5" from your desired stub height and place the arrow on that mark from the end of the conduit. Always confirm against the deduct table stamped on your specific bender head — 1" EMT is typically 6", and 2" EMT is 11".
Use multiplier 1.4 for a 45° offset. Distance between bend marks = 6" × 1.4 = 8.4". Shrinkage along the run = 8.4" − 6" = 2.4". Place the first mark, bend 45°, measure 8.4" along the conduit, place the second mark, and bend 45° in the same direction.
Mark the center of the obstruction on the conduit and align the teardrop (center mark) on the bender. For a standard 45° center saddle with 22.5° side bends, place side marks approximately 4" × 2.4 = 9.6" on each side of center. Bend the center 45° first, then each side 22.5° in the opposite direction. Budget roughly 3/4" shrink and verify clearance before committing the second side bend.
A box offset is a 4-point saddle using two 22.5° bends in the same direction, typically spaced about 2.5" apart on 1/2" EMT, to enter the top or bottom of a box without a full 90°. Use it when the conduit runs parallel to the wall and needs to slide into a box knockout cleanly. It saves wall space and looks cleaner than a stub and 90 into the box face.
One page. Voltage drop lengths, breaker and wire pairing, motor FLC.
$3.99
Buy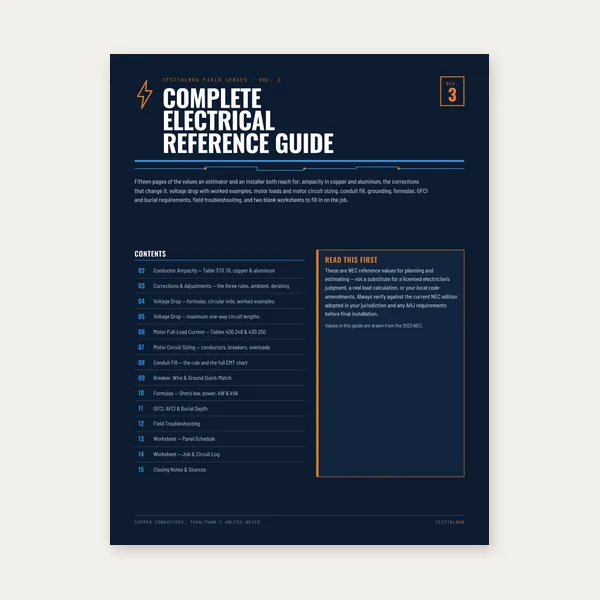
15 pages. Ampacity, corrections, voltage drop, motor circuits, conduit fill.
$12.99
Buy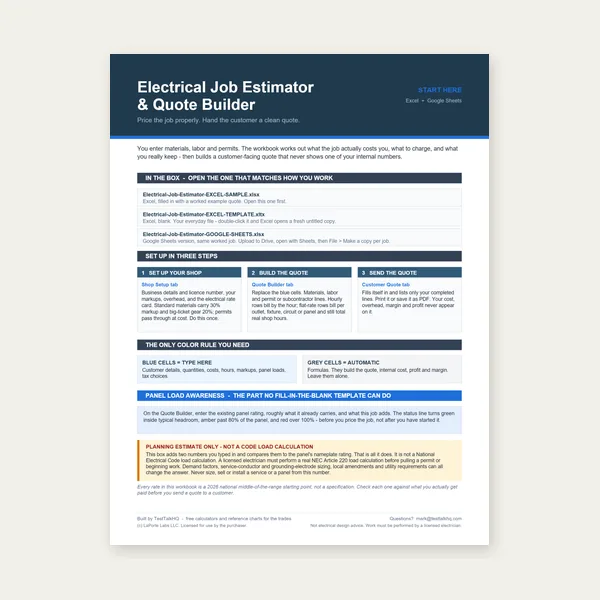
Quote electrical work and flag panel headroom before you price it.
Excel or Google Sheets. Best on a computer.
$29.00
Buy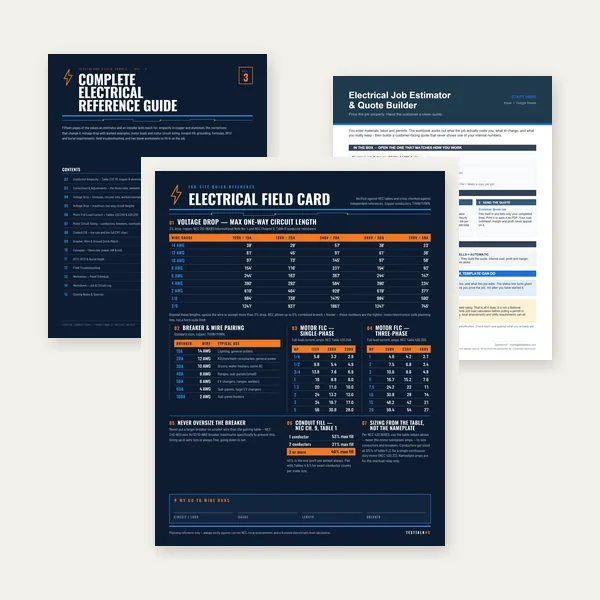
Card, 15-page guide and the estimator workbook. All six files.
Excel or Google Sheets. Best on a computer.
$34.99
$45.98 if bought separately — save $10.99
BuyCheckout opens in a new tab.